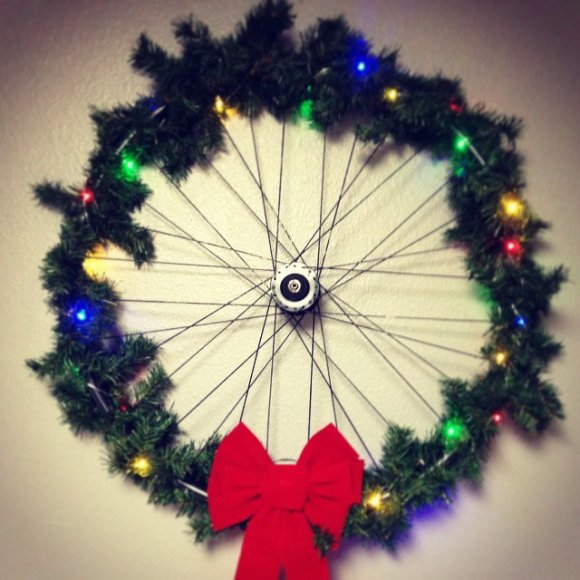
DIY Bike Wheel Christmas Wreath
1) Find an unused bike wheel, or get one donated by your local fave bike shop. Clean it up a little, or don’t, either way looks good!
2) Pick up the decorating items you need either from the outdoors or a store. Basic items needed are:
- Green garland ($5.99 for 9ft)
- Battery operated lights ($8.99 for 9.6 feet)
- Red velvet ribbon ($1.99ea)
Most of these items were on sale. You can also use natural tree clippings for the garland and scout out some pinecones to glue on as well.
3) Start by deciding what part of the wheel you want to be the top and the front.
4) Find the middle of the garland and wrap that around the bottom of the wheel where the bow will go. Work your way up each side, skipping every other spoke. You can use two 9ft garlands to make it thicker, or space one out so that you can see the rim.
5) Start the battery operated lights at the bottom of the wheel where the ribbon will go. You can have a little more play with the lights, wrap every spoke if you want or space them out more. You can usually adjust them to exactly where you want them. If there is a lot left over, re-wrap them tighter (every spoke) or if you need more to cover the space, skip a few spokes at a time. Same goes for the garland.
6) Wrap the bow on at the bottom and tuck the battery pack behind it. Voilà! You have your own DIY bike wheel wreath!
Merry Christmas and…
Adventure On!
~MtnMama
